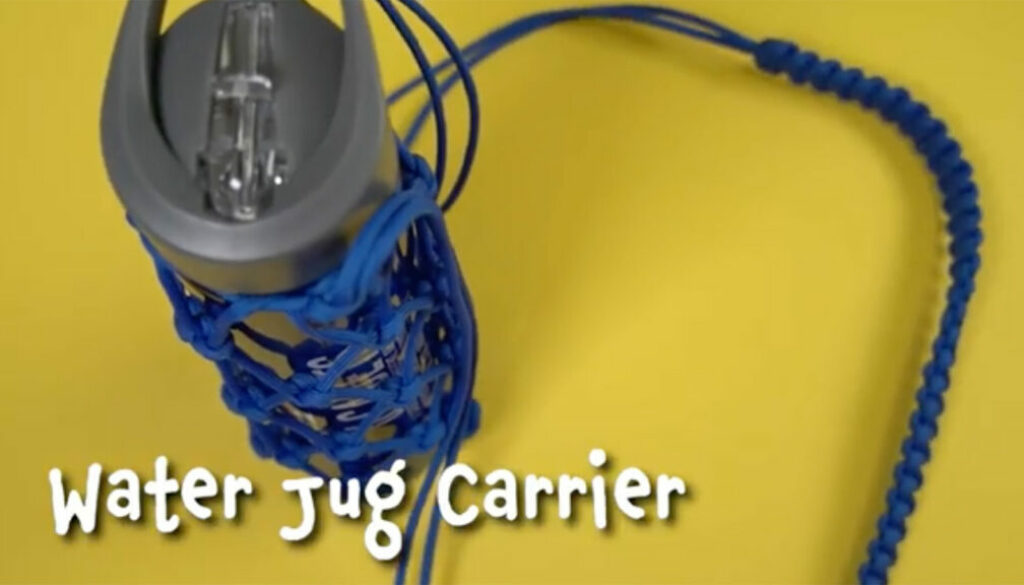
Summer Project – Water Jug Carrier
Follow these instructions (and the video) to make a water jug carrier!
You’ll Need
- 50 feet of #550 paracord
- 1 1/2 inch welded steel ring
- Round cord lock
- Scissors
- Lighter
- Bottle/Jug to wrap
- Ruler (optional)
Instructions (see video for details/example)
Step #1
Cut five pieces of paracord to 5 feet (1.5 meter) lengths.
Set these aside.
Step #2
Using the remainder of your paracord, fold it in half and push the bend through the cord lock.
Step #3
Cinch the cord lock loop around the neck of the bottle.
Coil the remaining cord into a hank to avoid tangling.
Step #4
Take the 5 ft pieces and tuck them through the neck loop.
Step #5
Cinch the cord lock tight.
Your 5 tucked cords should be pulled through so that they form 10 even strands.
Step #6
Spread the tucked cords out so they are equal distance apart from each other.
On each cord, the end that tucks under the neck loop should be oriented to the right.
Step #7
The Snake Knot
Take the left strand of one pairing and cross it over the right strand of the pairing to the left.
Loop that same strand behind and back to the left.
Make sure the working end loops up, not down.
Take the opposite strand and pull behind and to the right.
Take it over and through the left loop.
Slowly tighten your knot.
The spacing of the net is up to you, but keep each knot level with the one next to it.
Step #8
Move on to the next pairing, and make another snake knot.
Again, be sure the knots are level with each other.
Step #9
Continue the snake knots around the top row until complete.
Step #10
Start a new row below the first.
Remember to use strands from two adjacent groups. Keep knots level. Use a ruler to keep space between knots consistent.
Step #11
Continue knotting until you have reached the bottom of the bottle.
The last row of knots should almost touch the base of the bottle when pulled taut.
Step #12
Take the right strand from one pairing and loop it through the welded steel ring making a loop.
You are starting a cow hitch knot.
Step #13
The Cow Hitch
Finish the hitch by looping the strand through the opposite way and feeding the working end through the resulting loop.
Step #14
Tighten the completed hitch and adjust the length of your standing end so that the ring sits just past the center of the bast of your bottle.
Step #15
Make one more cow hitch by forming two underhand loops in opposite directions.
Pull tight after each loop.
Step #16
Take the strand to the left and make a single cow hitch.
Do not make a second hitch with this strand.
Remember – two loops makes one hitch.
Step #17
Continue this pattern until all strands are tied to the ring.
The right strand of each pairing will need two cow hitches. The left strand will need one.
Step #18
Cut each strand a little less than 1/4 inch (.64 cm) from the knots.
Don’t let the ends slip out.
Step #19
(You might want an adult’s help with this part)
Melt the ends and flatten them against the knot with the blade of the scissors.
You have now completed the net!
Step #20
To form the carry strap, take both ends of the bottle neck loop and make them equal length.
Both lengths should be around 10-12 feet (3-3.6 m).
Step #21
Form the core of your strap by looping the ends of both strands through the opposite side of your neck loop.
Use 3 feet (.9 m) of length for the strap.
Step #22
At the loop, make a cobra weave.
The Cobra Weave
Take the right strand and cross it over and to the left.
Take the left strand and bring it straight down and over the right strand.
Take the same strand and bring it under all and through the right loop.
Pull both strands to tighten.
Now start with the left strand and repeat the process.
Do one more starting with the right strand.
Step #23
Cut the left and right strands 1/4 inch from the weave.
(Again, you may want an adult’s help with the next part)
Melt the ends and flatten to the weave using the blade of the scissors.
Step #24
Find the center of your strap.
Begin your cobra weave about 8 inches from center.
Step #25
Take the two strands that were cut and even them.
Use a simple double overhand knot to start cobra weaving again.
Perform cobra weaving until you run out of paracord or your two sides are even.
You can release your overhand knot once you have completed a few passes of the weave.
Step #26
Cut, melt, and flatten all remaining cord ends.
If you have any questions or comments about this video, please send them to info@calvinistcadets.org.


